|
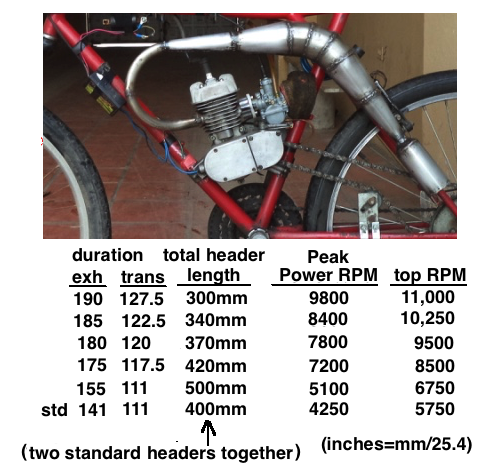
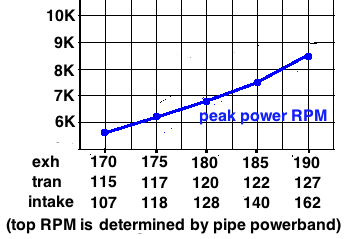
Jump down to the bottom of the page for my latest design and my offer to make it for you. I need to update this whole page but haven't found the time to do it yet. All the pipes sold for these engines are normal expansion chambers, not specially made for low RPM single speed street bikes. A normal expansion chamber only enhances the top 2500 RPM. My latest design differs by having an long special baffle (the end conical section) for a longer pipe powerband without as much power dip before getting into the powerband. I´m giving the design away here. Pipes aren't too hard to make. It just takes patience and determination. Here's my video on the subject: video The sheet metal ideally should be steel of .7mm to 1mm thickness. Someone told me that the steel from a water heater is just about right. If you buy a sheet then it should be the kind that rusts since it is easiest to weld. Don't use anything galvanized. You can use tin snips to cut the pieces out. A computer program (at pulserate.com) can printout the pieces on paper that you can use as patterns. I use a rubber mallet, pliers, and needle nose pliers to bend the pieces. I use a bicycle fork to bend/curve the pieces onto it by hammering the piece while it rests on the fork. Other metal cylinders of various diameters can also be used. You will need to find someone with an oxyacetylene or tig welder to weld it together. Emphasize to them that it needs to be lightly welded so that little "slag" extends inside the pipe. Suggest to him to minimize the flame size of the oxyacetylene torch. For an upswept pipe you can cut off the standard muffler and use the remaining curved section. The second section is only the curved header pipe cut from a standard exhaust pipe (cost $20). The header length sets the tuned distance for the desired maximum RPM, hopefully in harmony with the engine porting. I suggest the porting have 20 blowdown degrees. My engine has exhaust 163 and transfers 123 duration. This pipe in combination with the 20* blowdown is designed to rev to 9500 and a bit beyond. So if you dont want to rev that high then you will need a longer header (50mm more for 8500 max). Of course no one should rev that high without the correct counterbalance holes in the crank. Maybe some people are under the impression that a balanced crank is independent of max RPM. Au contraire. The balance is for a certain max RPM. The pipes powerband is 5500 to 9750 RPM which is almost twice as long as a normal expansion chamber. You can replace the 3 stage diffuser with a single stage one that will move some of the lower power up to the higher RPM range. A single cone diffuser would have a 6.2* angle (from center). For a quieter exhaust you can put metal scouring pads inside the last pipe section (around the baffle). Actually with the beginning of the stinger starting at the belly then you hardly even need a silencer. There is no feeling equal to having your own handmade expansion chamber on your bike and feeling the difference it makes. I knew nothing about making them but I just dived in and did it. Anyone with one brain and two hands can make the pipe sections and then the rest depends on the skill of the welder. I used my newly created Excel spreadhsheet to come up with these dimensions. Click here to read about how expansion chambers work and how lengthening the last cone (the baffle) extends the pipes powerband. Click here to see my page telling how to determine your exhaust and transfers durations. When making the pipe weld up the diffuser/belly section first and then separately the baffle section with the stinger welded onto its side. This pipe with an engine with 20 degrees blowdown will rev to 9500 RPM. Please read my section about reducing vibration because you need to do that when you raise the max RPM. |
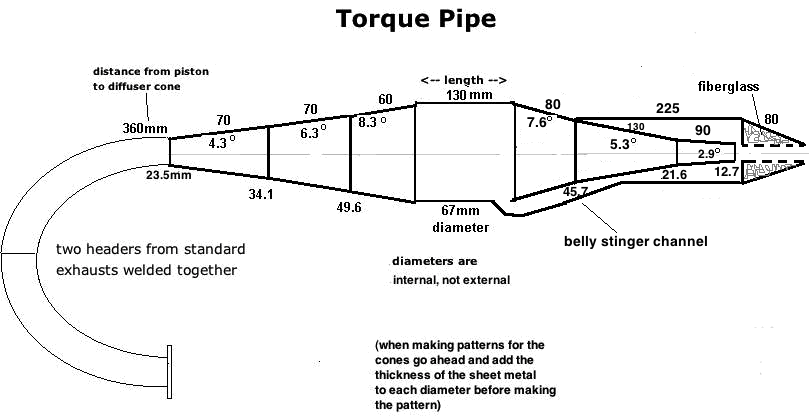
| Having the beginning of the stinger within the belly gives an astounding 84% less noise according to my decibel meter. Utilizing a stinger starting at the end cone of the baffle is nothing but convenience. There is no performance advantage to doing it that way. Gordon Jennings proved that letting the stinger start at the belly (midsection) drastically cuts the noise and gives a bit of torque increase, which is the purpose of this pipe. When I first made this pipe I made it with a conventional stinger but regretted having done so when I couldn't get the noise level down as much as I'd like for street use, even with the best muffler design. So then I modified it to be a side belly stinger as the first drawing on the graphic below. That allowed the exhaust to lose enough of its bark to not annoy my neighbors. |
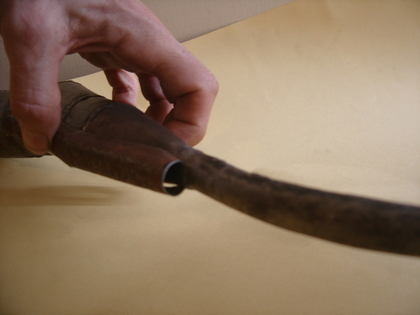
Drill hole in belly and fabricate the stinger channel:
Cut off the standard stinger where it mates to the baffle cone, weld the cone end to seal it shut.
Weld the channel to the pipe, and weld the stinger to the channel.
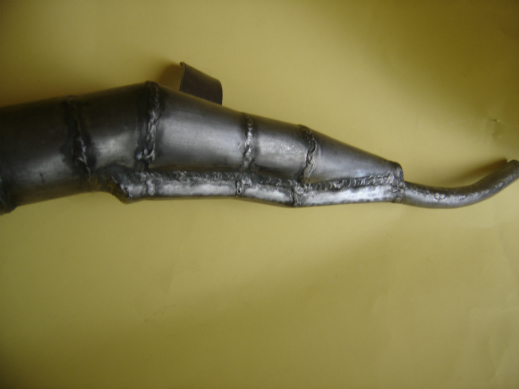
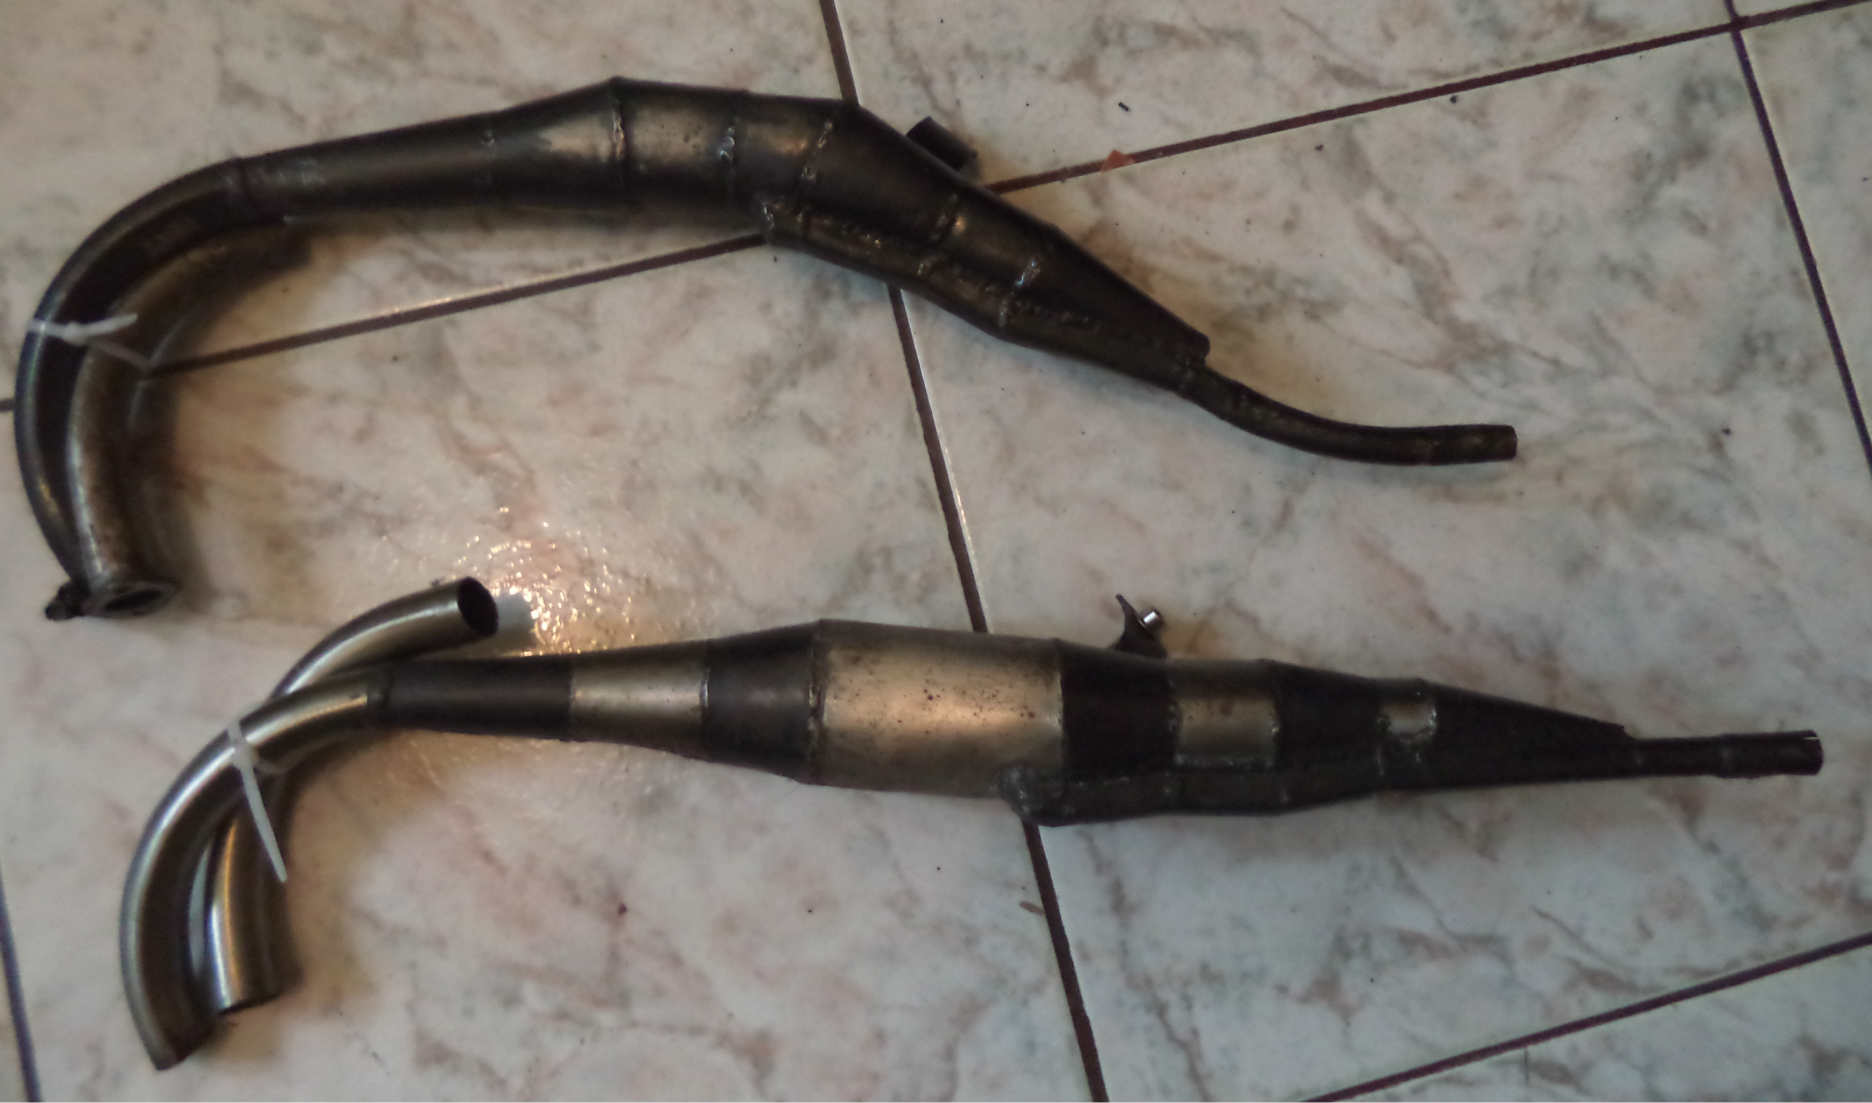
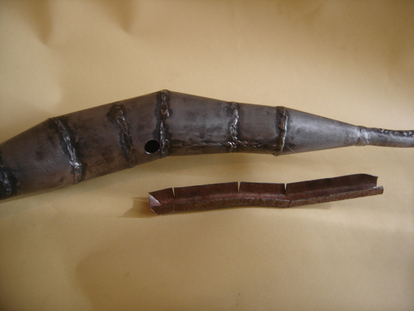
Here is a torque pipe (previous design) made for a 69cc engine. It still lacks the side channel stinger welded on.
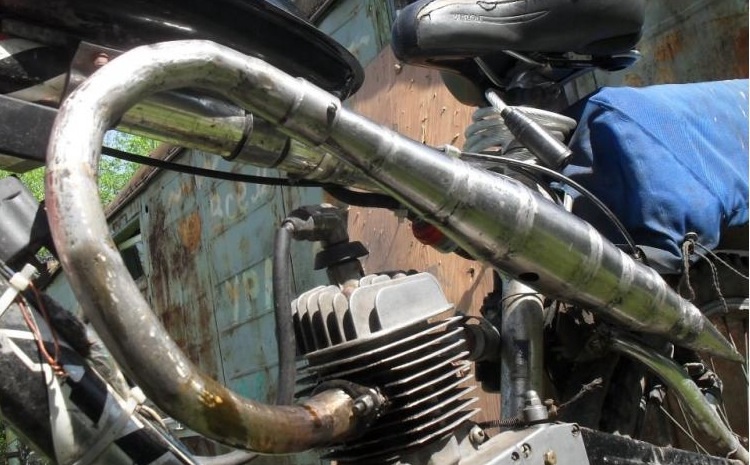
Here's what Paul has to say about it after he completed it: "The pipe really adds power. A LOT!
It works from the very start and I have a 35 tooth rear gear on the bike. It's really nice."
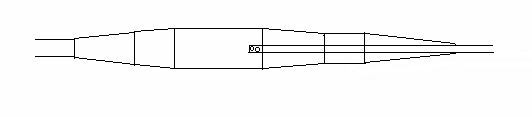
In order to have control of the sizing and therefore stinger flow restriction my advice now is to have an internal
stinger like what the following drawing shows. That is what I have on my pipe now. The end of the pipe at the
belly is welded shut and there are a few holes drilled in its side. That also helps to reduce the noise.
Refer to my excel pipe designing program to figure out the right inner diameter and stinger length for your engine.
Click here for a photo tutorial on making sections of the pipe. Click here for my youtube video showing/hearing the
difference between letting the exhaust exit from the belly and from the end of the baffle cone.