Microbe Electrifier usage
The idea behind these instructions is to give you a guideline for
amount of usage to match your body's amount of resultant cleansing
so that you don't try to do too much too soon and get sick from
excess cleansing. The immune system & liver & kidneys will
cleanse the blood of deactivated viruses/bacteria/yeast but only at
a rate that is unique to you. Therefore you should start out slowly
and every week increase usage time if you feel up to it. If you
have a Magnetic Pulser then use it first and don't start using the
Microbe Electrifier till you stop getting major cleansing reactions
from the Pulser.
It normally takes people 6-8 weeks to complete microbe electrification treatment although circulation impaired people and
people with CFIDS, AIDS, and other immune dysfunction diseases often
have to progress (increment the usage time weekly) more slowly.
Precautions: It's best to do blood electrification
first thing in the morning and even better if before eating
anything. In the morning is when the blood is the cleanest and
there is the least possibility of problems from transfection. If you are taking
drugs in the evening and there is a chance your kidneys haven't
fully cleaned the blood from them overnight then it's best not to
use the frequency of 4 hertz in the morning. You'll have to wait till the evening to use it.
4 Hz can be used before ingesting anything that can put
many chemicals (natural or synthetic) into the bloodstream. 40 Hz
causes almost no transfection but is less powerful against microbes than 4 Hz.
Protocol: Start by using the Microbe Electrifier for 15 minutes.
If the next day you don't feel very toxic (with
headaches, tiredness, achiness, etc) then increase your usage time
by 5 minutes. But if you get excess cleansing reactions then lessen the
treatment time to 5-10 minutes. To aid the body expel the trash from the
bloodstream you can drink a lot of water or celery
juice and take as a diuretic parsley tea, watermelon, or cucumber.
Your cleansing reactions determine the pace you need. It's normal to be able to
increase your usage time once a week (if
you're not having excessive cleansing reactions). Don't go so fast
that you overly sicken yourself with excess cleansing reactions. If
you don't start out slow the first 2 weeks then you may overly
lower your immune system (from white blood cell lysing) so that you could get sick from some
infection. I know of 2 people who used theirs at 4Hz for 1 hour
daily the first week and wound up getting pneumonia. Haste makes
waste. Do enough time so that you feel cleansing reactions but
don't overdo it. If you have an almost non-functioning immune
system and don't experience any cleansing reactions then take an herbal immune booster
such as Beta Glucan from www.nsc24.com to
increase your immunity.
If you've used the device for 2 months and you are still getting
cleansing reactions from it then you should continue using it daily
until you no longer get those reactions and then for one more week for 2-3 hours daily (1 in the morning and 1-2 at night).
Make sure the Microbe Electrifier is used every day without skipping
any. AIDS patients need to use it the same time every day (+/-
2hrs) because HIV has a 1.2 day life cycle. For viral infections,
if you skip a day then you'll have to continue using it for at
least 21 days from that skipped day because of the 21 day life
cycle of most viruses. Don't skip a day! If you are taking potent
drugs and/or herbs more than once a day or are generally toxic due
to poorly functioning kidneys then use the 40 Hz setting to avoid
transfection effects.
Positive Thinking: It may be helpful if you encouraged
yourself daily to resist the tendency to become skeptical and give
up. Do this by thinking positive thoughts about the new life you'll
have once you've regained your health. It will be definitely worth
any trouble encountered. Life can be so sweet when vitality
brightens every moment of your existence.
Choosing electrode site: Both electrodes on the inside of
one wrist is the easiest site for convenient usage, but it affects
the least amount of blood. But for some people the wrist is the
preferred electrode site because it will allow more electrical
current than other arrangements. Using one electrode on one wrist
and the second one on the other wrist is my favorite because plenty
of blood is affected. The only worry for some people might be any
disliking of the electrical current by the heart (although most of
the current travels through the blood and not through the heart
muscles). Using the electrodes on both ankles affects the most
amount of blood, but will barely allow enough electrical current
for some people (due to mineral deficiencies) and is hardest for
initiating and maintaining correct electrode placement.
Locating electrode placement sites for one wrist: The
locations on the two main arteries is on the inner side of either
wrist about 1+1/2 inches below the wrist crease to the outside of
the main tendons, between them and the bones. Over these arteries,
starting about 1" from the crease, is where the electrodes should
be placed. (Avoid placing electrodes directly over the thumb side
tendon to prevent muscular twitching during use.) The placement
site for the little finger side is actually more on the side of the
wrist. (picture)
Locating electrode placement sites for both wrists: The
locations are the inner side of the wrists about 1+1/2 inches below
the wrist crease to the outside of the main tendon on the little
finger side or thumb side. Each wrist should have one electrode
held in place by one wrist band. (picture) This is the
most preferred electrode placement.
Locating electrode placement sites for ankles: On the inner
side of each foot locate the pulse of the unseen artery between the
ankle and the heel. If you can't feel it then go for a brisk walk
for ten minutes and then feel for it without elevating your foot.
On top of these pulsating arteries are the sites. (picture)
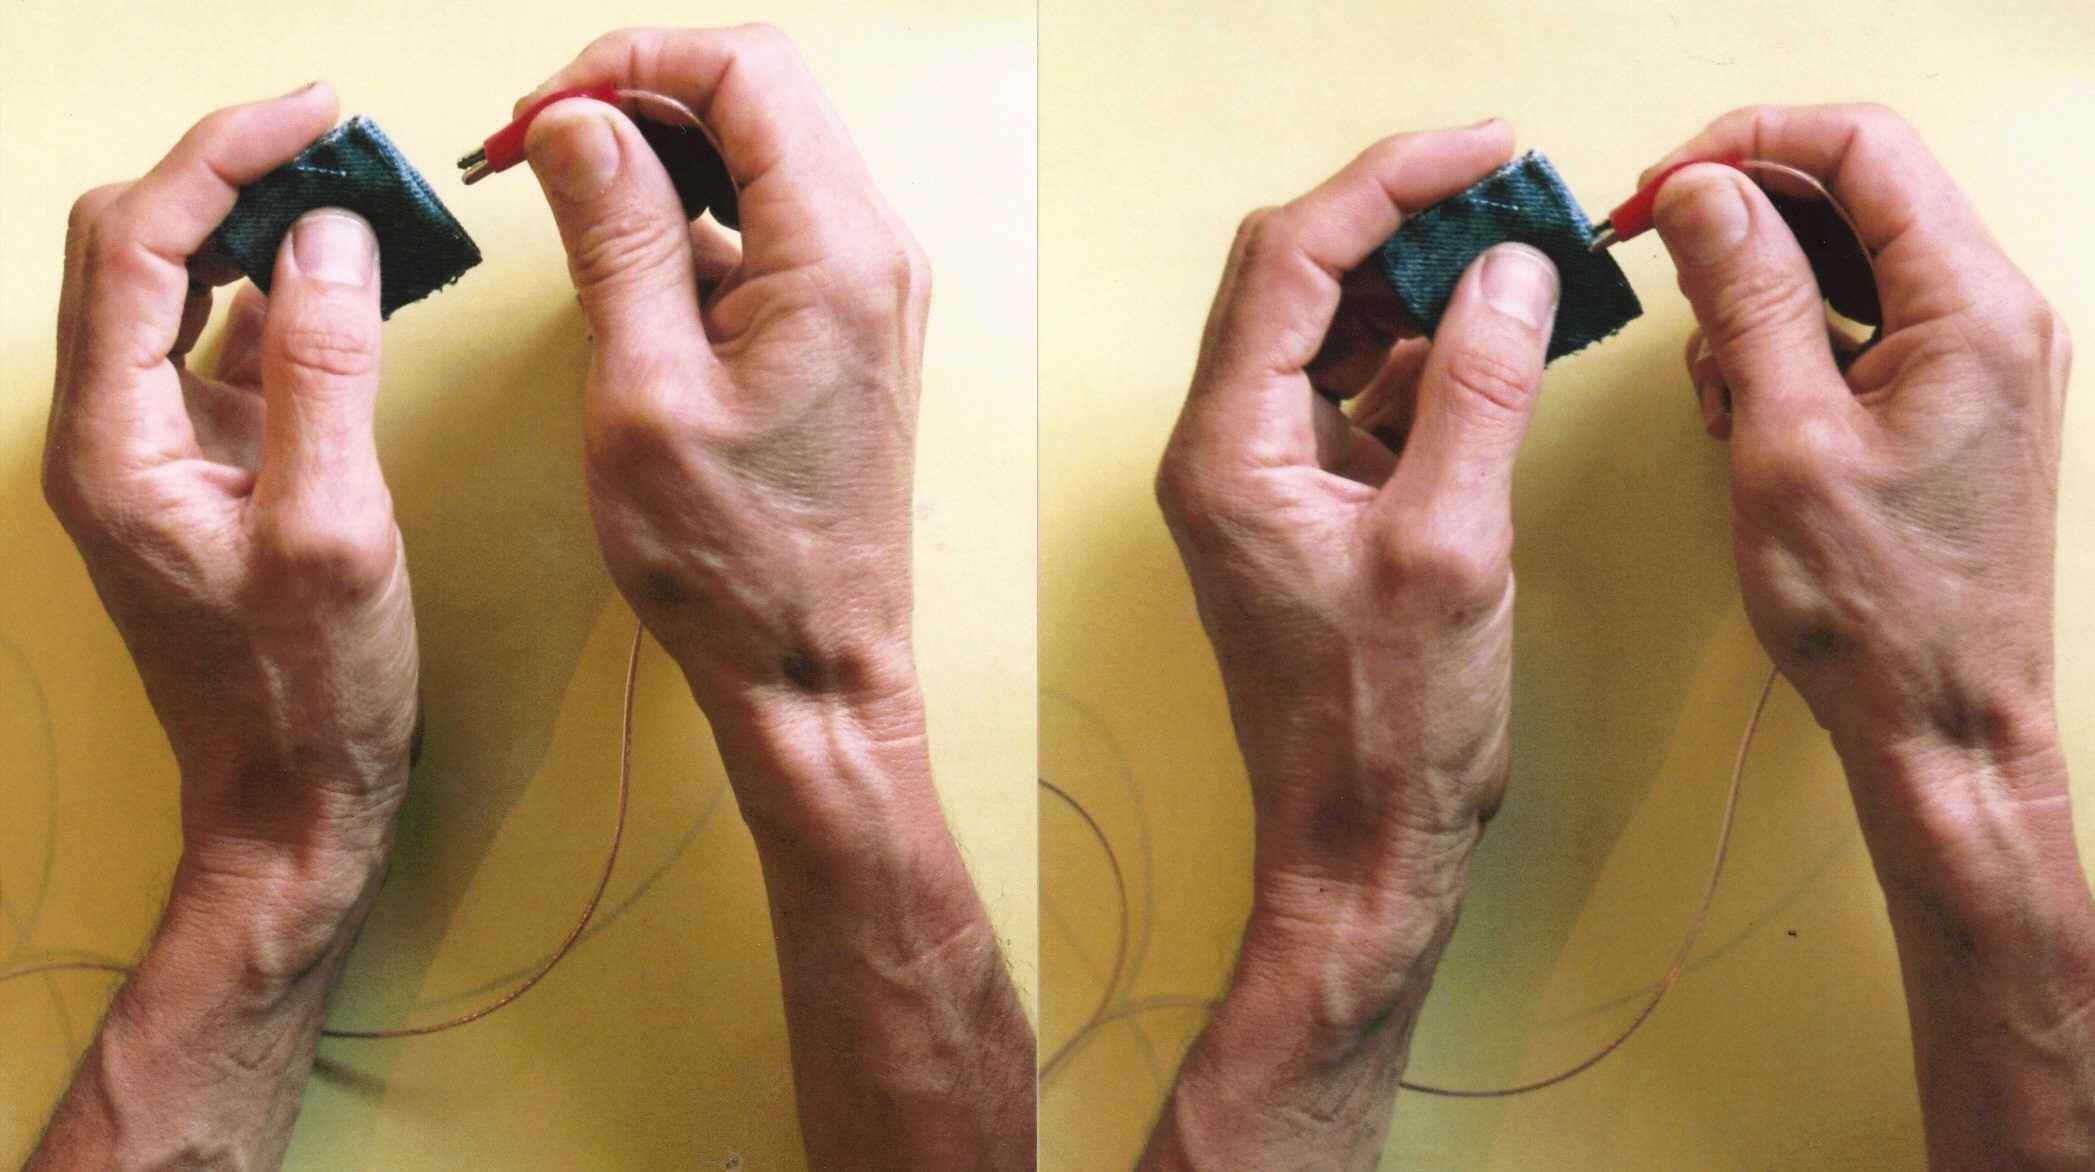
Connecting Electrodes: Clean & dry the electrode sites. Soak each
of the cloth electrodes thoroughly with tap water. Squeeze the middle of the insulation of the
Microbe Electrifier's
alligator clips (at the end of its wires) so that you open the jaws
and then let them bite onto the electrodes ends. (picture)
Place the electrode over the artery.
Then put the elastic band around it and the wrist. Don't
pull it tight. Just enough stretch to keep it in place is good.
If using electrodes on the ankles, then attach them there with 1" wide
medical tape. Re-wet the cloth electrode after 1 hour of use.
Making Saltwater: If your tap water isn't very electrically
conductive then you can make some saltwater by putting a couple of shakes of
salt from the saltshaker into a cup of purified water and stirring it. This is very electrically conductive but
also very corrosive to the alligator clips.
Using the device: Connect the wet electrodes to you. Turn
the current control dial fully counter-clockwise, set the unit to "ME", and flip
the switch to the ON position. Turn the current dial clockwise until the red ".14mA" light comes fully on. Most people can't feel this amount of current but it is enough to do the job unless you use both electrodes on one wrist (which isn't advised). If the
electrodes 'sting' or 'bite' then 1) the current dial setting is too high, 2)
your skin is dirty, 3) you need to relocate the electrodes.
Comfort Suggestions: If the elastic strap is too tight it
will leave ridges on the skin when taken off. You can also sew
something soft onto the inside of the band (if a natural fiber then
not where the electrodes will be because natural fibers will wick
away the electrodes moisture). If your skin becomes irritated where
the electrodes touch then maybe you're applying too much current or you should
place the electrodes on the ankles instead of the wrists.
3" Pad Electrode Usage: You can use the provided pad electrodes (or
anything else made of 100% cotton)
for
treating any injured or infected area of the body (ie: gastritis,
hepatitis, stomach virus, infected wound, sore throat, etc) by letting
the
electricity affect the area of the body that is between the two
pads. That is what is meant by "localized treatment". To use them,
first put the 3" square cloth pad electrodes into tap water
until fully wet. Connect each
alligator
clip onto the edge of each pad so that one of the 'jaws' is
sandwiched inside the pad. Repeat for the second pad
and alligator clip. Place them on your body so that the infected
area is between them. Hold them in place with elastic or with
plastic if you are holding them with your hands. Then with the
frequency switch set
to 4Hz, and the current control dial fully
counter-clockwise, turn the unit on and move the
current control dial clockwise until you feel an electrical tingle.
Treat for
at least 30 minutes a day. Click
here to read more about electricity promoting healing.
Click here for instructions on treating hepatitis.
|