|
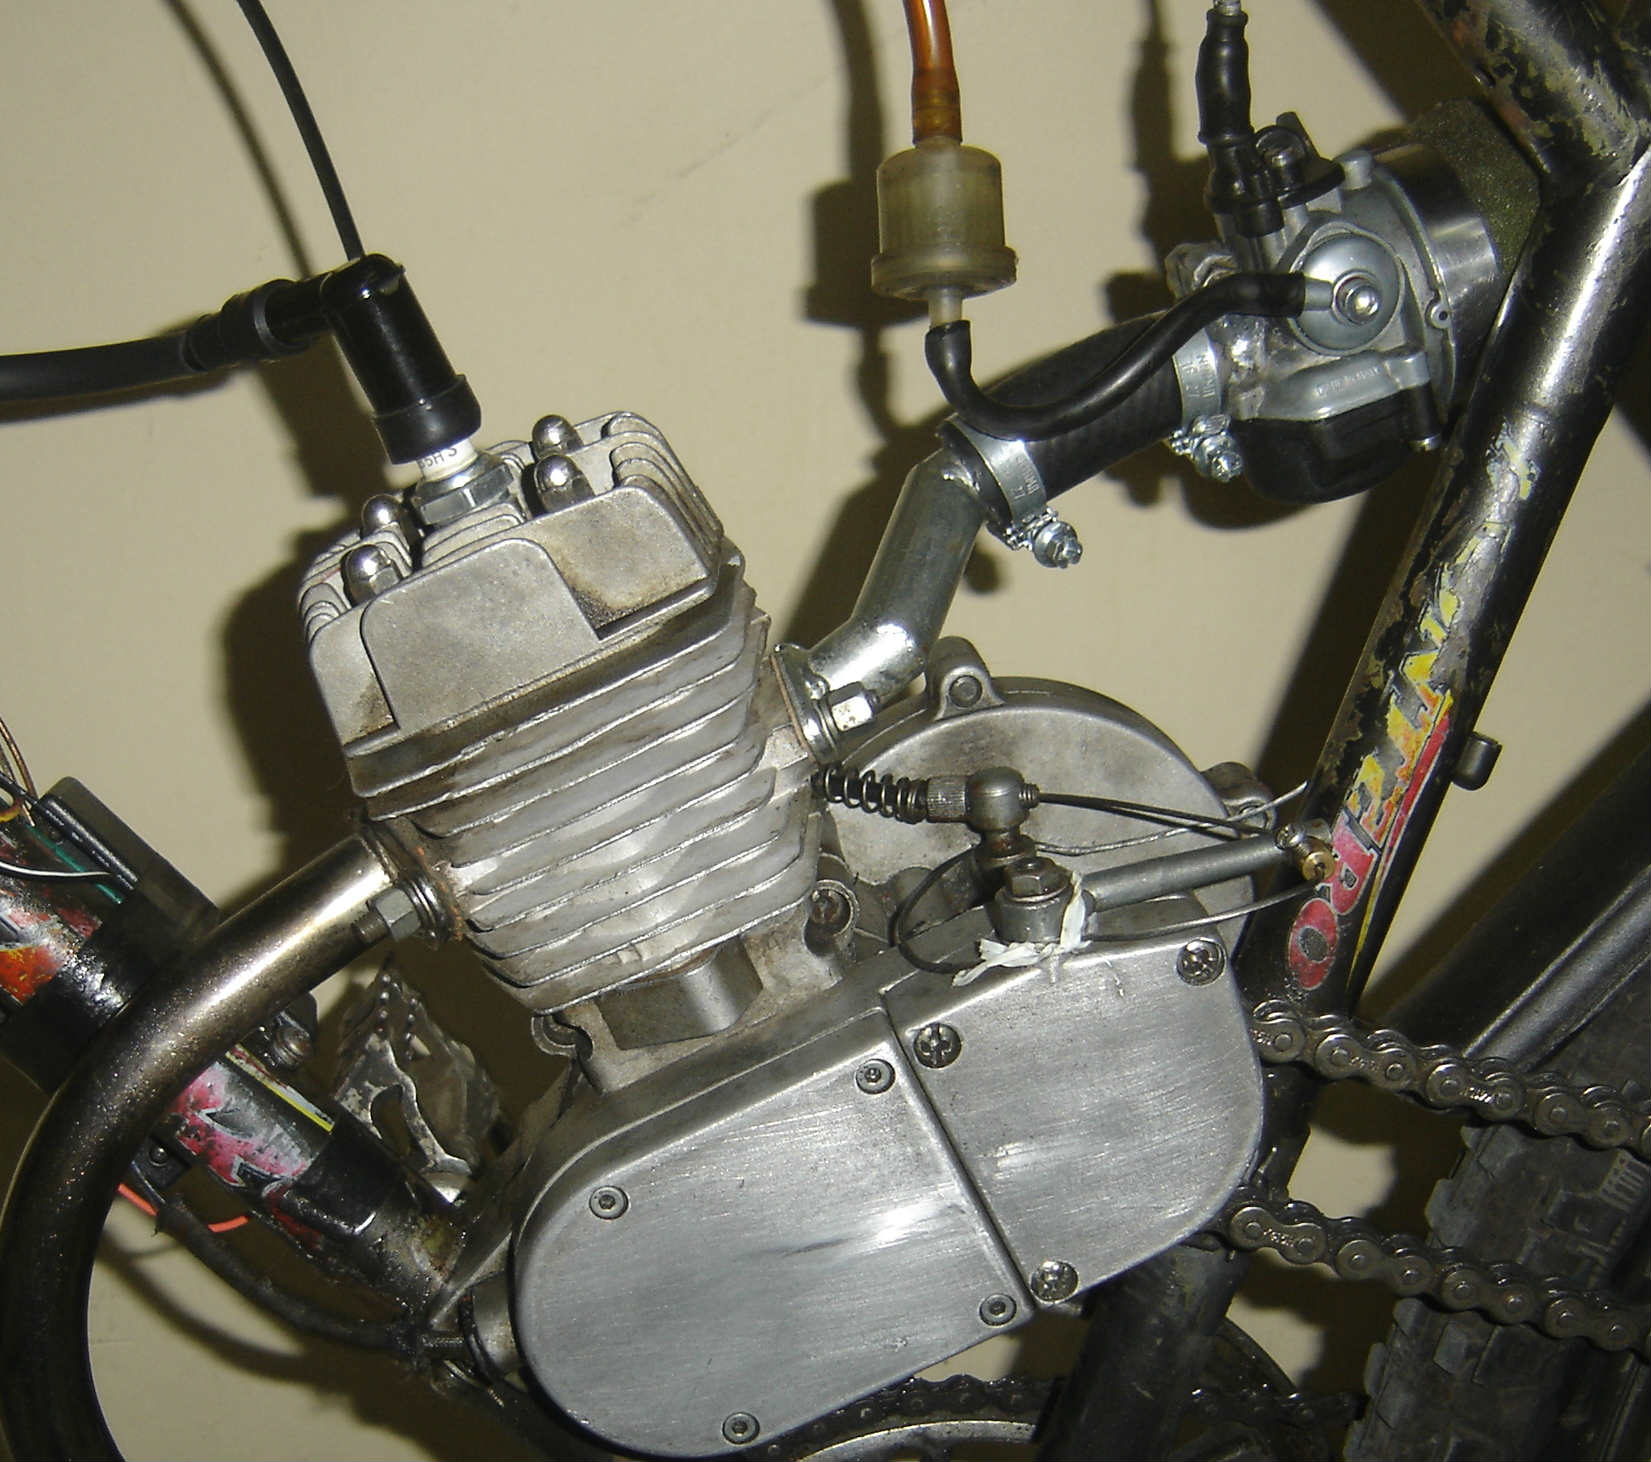 #2: Reed Valved intake engine: A reed valved engine with an custom expansion chamber is the way to go with wicked engine porting for top end power. Most of the available expansion chambers are not the way to go because they aren't designed specifically for this 1 speed engine. Pictured below: 55cc engine, Rock Solid reed valve, nylon adaptor, 18mm Mikuni, my pipe. 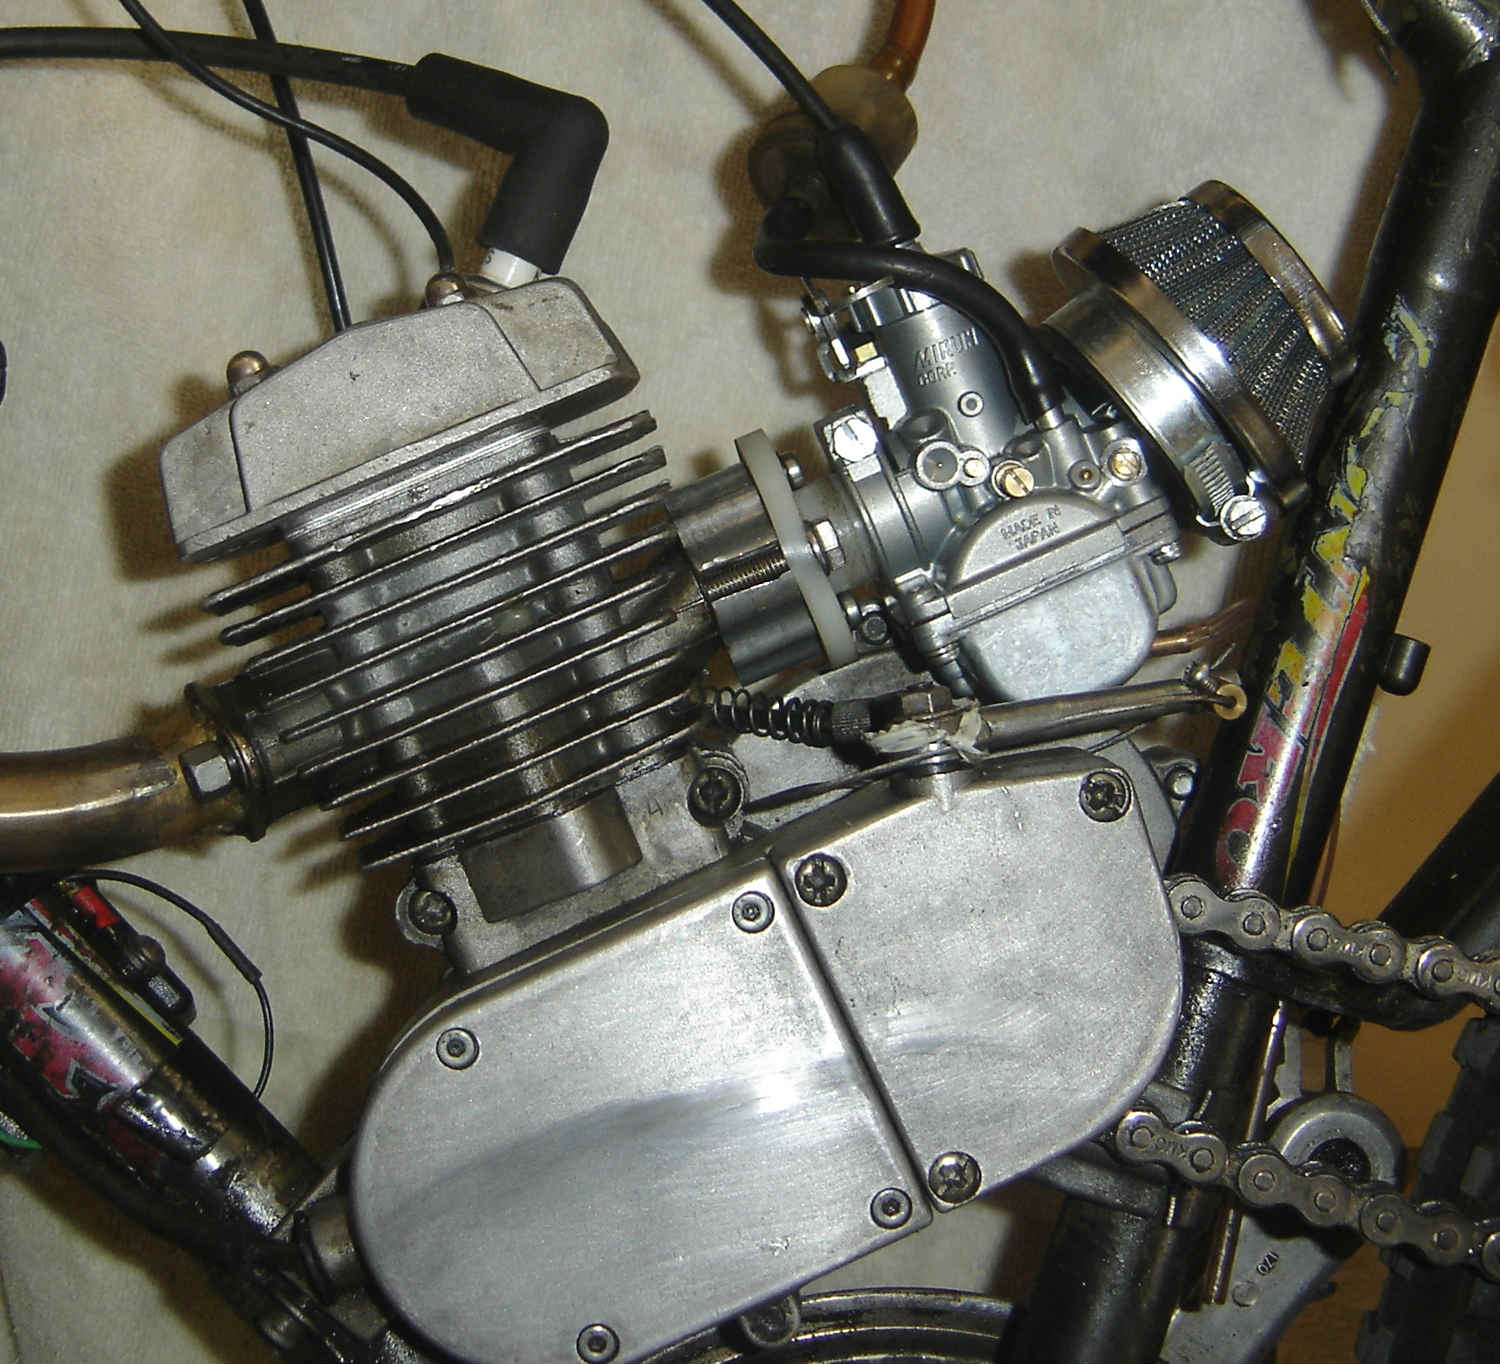 Basic Necessities for both types of engine: COMPRESSION: Lath the stock heads mating surface down for more compression and buy an upper connecting rod bearing because the stock one wears out too fast with increased compression. Extra compression, especially from the very low stock compression, gives very noticeable power increases all thru the rev range. Unfortunately increasing the compression is not recommended if you still have the stock CDI. That is because the overly advanced ignition in conjunction with increased compression causes too much ignition compression before top center which causes excess engine heat which can melt the piston and damage the upper wrist pin bearing. CARBURETOR: Replace the good-for-nothing stock carburetor. For a carb with the same 19mm connection you need to buy a Dellorto SHA or a CNS carburetor, neither of which are very good. Better to get a 16mm or 18mm Mikuni (model: VM) or Dellorto PHBG which are super excellent. For the Mikuni you should buy the long (to provide 7" intake) zig-zag offset intake (so the carb is besides the vertical frame post) and right connector (O.D. 21mm for 16mm Mikuni, 20/23mm for 18mm). If you are getting a reed valve also then request Rock Solid to make the intake size the extra 23mm (for VM18) or 21mm (for VM16) instead of the standard 19mm. CDI: Replace the crappy stock CDI with the Jaguar CDI. It will run smoother (less vibration) with more power and less engine heat. And it makes the engine more reliable. And you can increase compression. CRANK SEALS: The stock seals don't last very long, especially if you stuff the crank for more crankcase compression (for more top end power). Order both sizes of crank seals since the left and right sides are different. You can use a jewelers screwdriver to pry out the old seals instead of splitting the cases to get to them. On the right side of the crankshaft there is a sharp lip that makes it hard to install the seal since it catches there. Use a file or your Dremel to round off that lip. PISTON WRIST PIN: The stock one is too heavy and causes engine vibration. Treatland sells lighter ones. NUTS & BOLTS: Replace all the nuts and bolts with a kit from BikeBarry. The stock ones are too soft and loosen and wear out too fast. This is a reliability issue. Use medium grade Loctite when assembling. CLUTCH: If the extra power causes the clutch to slip then these are the necessary steps to increase clutch spring preload: The main clutch spring that
squeezes the clutch together is inside the transmission case, between
the clutch and final drive sprocket. It is adjustable from the outside
of the cases. 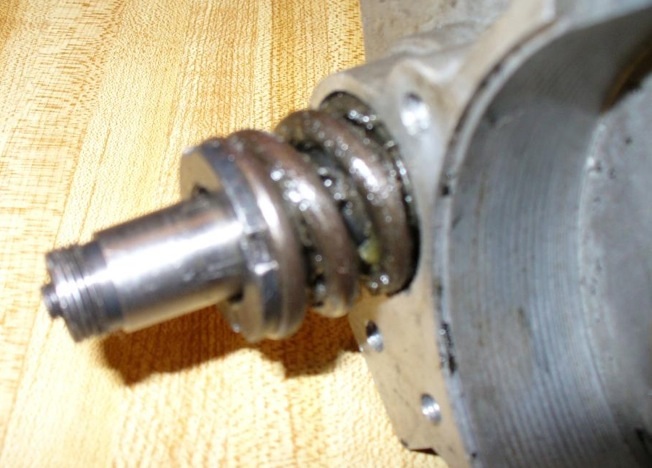 People are making the mistake of getting a shifter kit to try to make up for the lack of power of non-modified engines. But the shifter kit costs more than what it takes to get the power you need. I had a 48cc engine in a high altitude (8500 ft) city that was hilly. With a few basic mods (higher compression, carburetor, intake extension) I was almost happy with it. Then I put a 55cc top end on it and it was just fine without the hard-to-use shifter kit. Simplicity is beautiful. A single speed motorbike can be just fine up to 30mph and can climb most hills. |