|
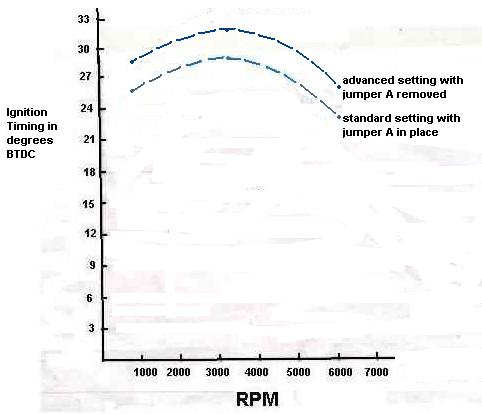
There are three electrical jumpers on the circuit board. "A1" controls the whole ignition timing curve, normal or advanced. B jumpers control the amount of curve to the timing especially after 3000 rpm. Below you can see the graph for jumper A (with both B jumpers removed) and the two resultant timing curves. Removing the jumper causes a timing advance of 3 degrees for the whole curve.
 Here you can see the graph for the B jumpers and the two timing curves (with jumper A in place). Having the upper jumper in place reduces the timing advance by 1.3 degrees around 3600rpm, and by 1.7 degrees around 6000rpm.
 DETERMINING BEST JUMPER SETTINGS: The best settings for my bike (55cc Grubee) with a standard stator coil is all jumpers removed (which is the way you will receive yours. the jumpers are inside the plastic bag.). But go ahead and test the settings for your bike to see what works best. Jetting, porting, compression, and exhaust pipe all affect the needed timing. Test jumper A going up hills and test jumpers B for top speed on a level road. Which ever jumper setting allows the highest mph is the setting you should use. HOW TO UTILIZE THE JUMPERS: Just remove the boxes 4
screws with a small Phillips screwdriver. If your screwdriver doesn't fit
in the screw head properly then it will slip when turned. Don't go any
farther if this happens. Go directly to a store and buy a fine-tipped
screwdriver that will work properly. Otherwise you will ruin the screw
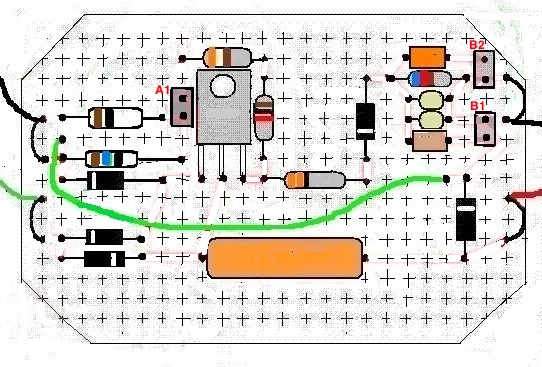
heads. Once the box lid is removed you can see the three black jumpers
labelled "A" and "B" in this picture. They can be installed and removed easily with needle nose pliers. Keep the removed jumper in something that is sealed such a a
zip-lock sandwhich bag so you won't lose it. Once you settle on jumper
settings you can remove the protective strip from the double backed tape
on the box lid and adhere the box to your bike frame.
 |