|
There is one 2 position switch (A) on the circuit board which can advance low RPM timing and one dual switch (B) which can retard timing at high RPM. You can experiment with them to see what you like best for your bike. HOW TO ACCESS THE SWITCH: Just remove the boxes screws with a small Phillips screwdriver. Once the box lid is removed you can see the switches. You can just use your fingernail or a small screwdriver to manipulate the switches. Once you settle on switch settings then use silicone sealant to seal the lid so the box is waterproof. 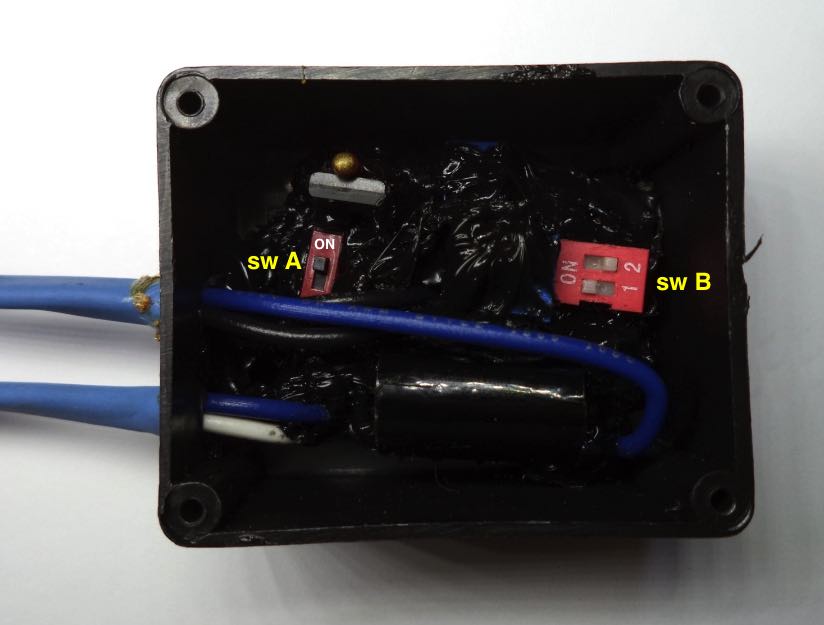 But first just plug the CDI into
the CDI connectors which
should be the same.   DETERMINING BEST SWITCH
SETTING: Test the settings for your bike to see what works
best. Jetting, porting, compression, and exhaust pipe all affect
the needed timing. Which ever switch setting allows the best
acceleration is the setting you should use because that indicates best
harmony between the timing curve and engine/pipe for maximum power. Here is the timing graph showing
the effect
of switch A with the lever "off" (in the low position) and the 3 timing
curves resulting from different B switch settings: 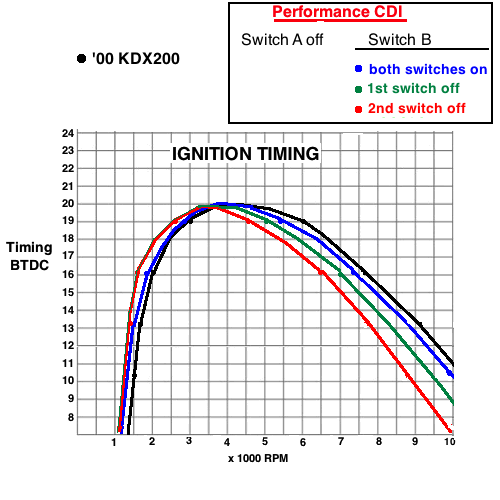 Here is the timing graph showing the effect of switch A with the lever "on" (in the high position) and the 3 timing curves resulting from different B switch settings. More advance at lower RPM is usually gives better power although most riders don't ride at less than 4000 RPM. The advantage to having more low RPM advance is causing a more rapid timing curve change as the RPM increases which is more ideal.  I think that the 2nd graphs red curve is the best of all of them but of course you can't know for sure without experimenting with each switch position. It comes new with that setting. If you want to keep it like the stock CDI then just put switch A off and both of switch B on. The more retarded the timing is at top RPM the higher the engine can rev but if it's too retarded the acceleration is less than it could be. |