|
There is one 3 position switch on the circuit board which mostly affects mid range timing and one 2 position switch which has the greatest affect over 4000 RPM. You can experiment with them to see what you like best for your bike. DETERMINING BEST SWITCH SETTING: Test the settings for your bike to see what works best. Jetting, porting, compression, and exhaust pipe all affect the needed timing. Which ever switch setting allows the best acceleration is the setting you should use because that indicates best harmony between the timing curve and engine/pipe for maximum power. Here is a timing curve graph showing the stock CDI versus the Performance CDI with its three M.R. Boost settings: 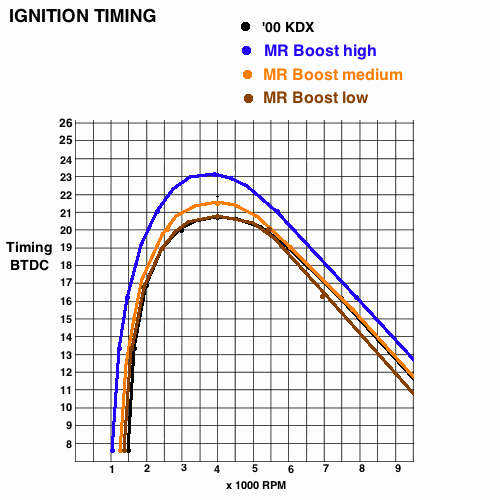 Here are graphs showing the effect of the H.R. Boost switch with the high and medium and low settings of the M.R. Boost switch: 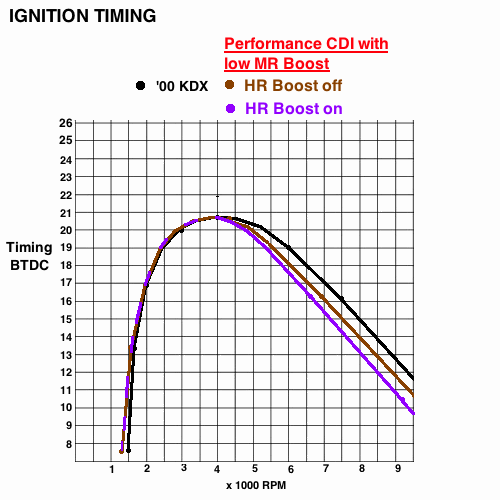 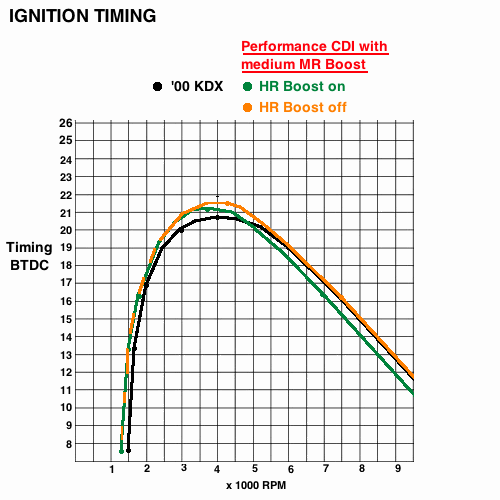 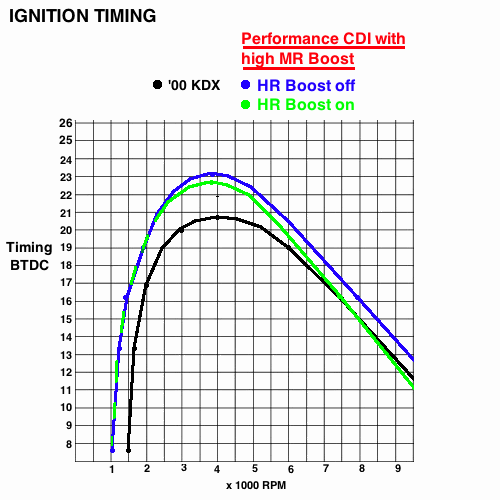 HOW TO ACCESS THE SWITCH: Just remove the boxes screws with a small Phillips screwdriver. Once the box lid is removed you can see the switches. You can just use your finger to manipulate the switches. Once you settle on switch settings then use silicone sealant to seal the lid so the box is waterproof. 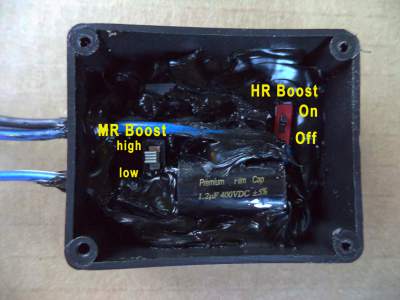 |